Why No-Bake Strawberry Crunch Cheesecake Wins
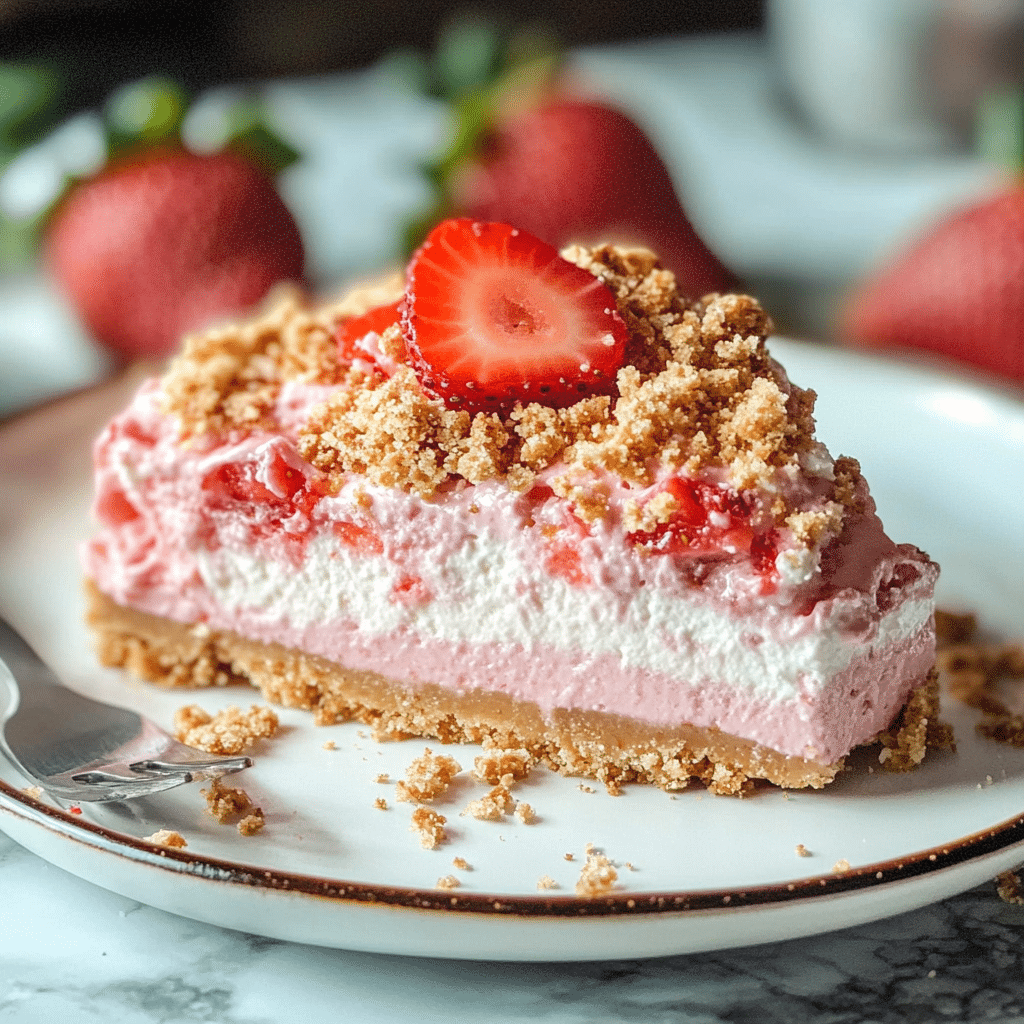
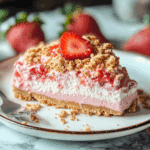
If you’re on the hunt for a dessert that combines creamy decadence with a burst of fresh fruit flavor and a satisfying crunch, the No-Bake Strawberry Crunch Cheesecake is your answer. This delightful treat brings together the silky smoothness of cheesecake with the sweet juiciness of strawberries and a crunchy base, making it an irresistible option for every occasion. Quick to prepare and requiring no oven time, this dessert is as simple as it is spectacular, perfect for impressing guests or treating yourself after a long day.
Why You’ll Love This Recipe
- Effortless preparation: No baking means less fuss and more time to enjoy your cheesecake.
- Fresh and vibrant flavors: The strawberries bring natural sweetness and bright color to every bite.
- Crispy texture contrast: The crunchy base adds a delightful crunch that elevates the creamy filling.
- Perfect for any season: Whether it’s summer or winter, this dessert fits right in.
- Customizable and adaptable: Easy to tweak for dietary needs or flavor adventures.
Ingredients You’ll Need
Crafting the perfect No-Bake Strawberry Crunch Cheesecake relies on a handful of simple ingredients, each playing a crucial role in taste, texture, and appearance. From rich cream cheese to fresh strawberries, these essentials combine effortlessly to deliver a mouthwatering dessert.
- Cream cheese: Provides the creamy and tangy base essential to cheesecake’s signature flavor.
- Heavy cream: Whipped to add lightness and fluffiness to the filling.
- Sugar: Balances the tanginess with sweetness for a perfectly mellow taste.
- Vanilla extract: Adds depth and warmth to the cheesecake flavor profile.
- Strawberries: Fresh, ripe berries give juiciness and vibrant color.
- Graham crackers or digestive biscuits: Crushed to create the crunchy crust foundation.
- Butter: Binds the crust ingredients together while adding richness.
- Crunchy topping (optional): Like toasted nuts or cereal flakes for extra texture.
Variations for No-Bake Strawberry Crunch Cheesecake
One of the best parts about the No-Bake Strawberry Crunch Cheesecake is how easy it is to personalize. Whether you’re swapping ingredients for dietary reasons or just wanting to experiment with new flavors, this recipe welcomes creativity with open arms.
- Vegan version: Use plant-based cream cheese and coconut cream to make it dairy-free.
- Different crusts: Try crushed pretzels or gluten-free cookies for unique crunch and flavor.
- Mixed berries: Add blueberries or raspberries to the strawberry layer for a vibrant medley.
- Chocolate drizzle: Enhance richness with a layer of melted dark or white chocolate on top.
- Citrus twist: Incorporate lemon or lime zest into the filling for a zesty kick.

How to Make No-Bake Strawberry Crunch Cheesecake
Step 1: Prepare the crust
Start by crushing your graham crackers or preferred biscuits into fine crumbs. Melt the butter and mix it thoroughly with the crumbs until the mixture resembles wet sand. Press this firmly into the base of your serving pan to form an even, compact layer. This crust will provide the perfect crunchy contrast to the creamy filling.
Step 2: Make the cheesecake filling
In a large bowl, beat the cream cheese until smooth and fluffy. Gradually add sugar and vanilla extract, mixing well. In a separate bowl, whip the heavy cream until soft peaks form, then gently fold it into the cream cheese mixture. This step ensures a light, airy texture that’s essential for the cheesecake’s melt-in-your-mouth experience.
Step 3: Add the strawberries
Chop fresh strawberries into small pieces and fold most of them gently into the cheesecake filling, saving some for the topping. The strawberries create bursts of juicy sweetness throughout the creamy layer and add a beautiful pink hue.
Step 4: Assemble and chill
Pour the combined filling over the prepared crust and smooth the top with a spatula. Scatter the reserved strawberries and your choice of a crunchy topping evenly on the surface. Cover the cheesecake and refrigerate it for at least 4 hours, allowing it to set perfectly without baking.
Pro Tips for Making No-Bake Strawberry Crunch Cheesecake
- Room temperature cream cheese: Ensures a smoother filling without lumps.
- Use fresh strawberries: The flavor and texture shine brightest with fresh, ripe fruit.
- Chill sufficiently: Patience during refrigeration guarantees proper firmness.
- Gentle folding: Keeps the filling airy and prevents it from deflating.
- Secure crust: Press crumbs firmly to avoid a crumbly base when slicing.
How to Serve No-Bake Strawberry Crunch Cheesecake
Garnishes
Top your cheesecake with freshly sliced strawberries, a light dusting of powdered sugar, or a drizzle of strawberry syrup to enhance its inviting appearance and flavor.
Side Dishes
Pair the cheesecake with a cup of hot tea or freshly brewed coffee, or serve alongside vanilla bean ice cream for an extra indulgent treat.
Creative Ways to Present
Try individual servings in clear jars or glasses to highlight the beautiful layers, or decorate with edible flowers and a sprig of mint for an elegant touch that’s sure to impress.
Make Ahead and Storage
Storing Leftovers
Keep your leftover No-Bake Strawberry Crunch Cheesecake in an airtight container in the refrigerator for up to four days to maintain freshness and texture.
Freezing
This cheesecake freezes well; wrap it tightly in plastic wrap and foil to prevent freezer burn, and thaw overnight in the fridge before serving.
Reheating
As a no-bake dessert, this cheesecake is best served cold and should not be reheated. Simply let it sit at room temperature for 10-15 minutes if you prefer a softer texture.
FAQs
Can I use frozen strawberries for the cheesecake?
While fresh strawberries are ideal for texture and flavor, frozen strawberries can be used if thawed and drained thoroughly to avoid extra moisture.
Is there a gluten-free option for the crust?
Absolutely! Use gluten-free cookies or graham crackers to make the crust safe for gluten-sensitive diets without sacrificing crunch.
How long does the cheesecake need to chill before it’s ready?
It’s best to chill the cheesecake for at least 4 hours, though overnight chilling yields the best firmness and flavor melding.
Can I double the recipe for a larger batch?
Yes, this recipe scales up easily — just double the ingredients and ensure you have a larger pan to accommodate the increased volume.
What can I substitute for heavy cream?
For a lighter version, you can use whipped coconut cream or a non-dairy cream alternative, but this might slightly alter the texture.
Final Thoughts
The No-Bake Strawberry Crunch Cheesecake is one of those dishes that feels like a little gift to your taste buds every time you indulge. Its fresh strawberry flavor, creamy filling, and crunchy crust make it more than just a dessert — it’s a celebration of textures and tastes that comes together with minimal effort. I can’t wait for you to try this recipe and discover why it’s a crowd favorite every single time!
PrintNo-Bake Strawberry Crunch Cheesecake
No-Bake Strawberry Crunch Cheesecake combines creamy, tangy cheesecake with fresh, juicy strawberries and a crunchy crust for a refreshing, easy-to-make dessert. Perfect for any occasion, this no-oven recipe offers a delightful mix of textures and vibrant flavors that can be customized to your preferences.
- Prep Time: 20 minutes
- Cook Time: 0 minutes
- Total Time: 4 hours 20 minutes
- Yield: 8 servings 1x
- Category: Dessert
- Method: No-Bake
- Cuisine: American
- Diet: Gluten Free (if using gluten-free crust)
Ingredients
For the Crust
- 1 1/2 cups graham cracker or digestive biscuit crumbs
- 6 tablespoons unsalted butter, melted
- Optional: 1/4 cup toasted nuts or cereal flakes for crunchy topping
For the Filling
- 16 oz (450 g) cream cheese, at room temperature
- 1 cup heavy cream
- 3/4 cup granulated sugar
- 1 teaspoon vanilla extract
- 1 1/2 cups fresh strawberries, chopped (reserve some for topping)
Instructions
- Prepare the crust: Crush the graham crackers or preferred biscuits into fine crumbs. Melt the butter and mix thoroughly with the crumbs until the mixture resembles wet sand. Press the mixture firmly and evenly into the base of your serving pan to form a compact layer that will provide a crunchy contrast to the filling.
- Make the cheesecake filling: In a large bowl, beat the room temperature cream cheese until smooth and fluffy. Gradually add the sugar and vanilla extract, mixing well. In a separate bowl, whip the heavy cream until soft peaks form. Gently fold the whipped cream into the cream cheese mixture to create a light, airy texture.
- Add the strawberries: Chop fresh strawberries into small pieces. Fold most of the chopped strawberries gently into the cheesecake filling, reserving some for decorating the top.
- Assemble and chill: Pour the combined filling over the prepared crust and smooth the surface with a spatula. Scatter the reserved strawberries and optional crunchy topping evenly on top. Cover the cheesecake and refrigerate it for at least 4 hours to set perfectly without baking.
Notes
- Use room temperature cream cheese for a lump-free, smooth filling.
- Fresh strawberries give the best flavor and texture, but thawed and drained frozen berries can be used.
- Chill the cheesecake for at least 4 hours, preferably overnight, for optimal firmness.
- Gently fold the whipped cream into the cream cheese to maintain an airy texture.
- Press crumbs firmly when forming the crust to prevent it from crumbling when sliced.
Nutrition
- Serving Size: 1 slice (1/8 of recipe)
- Calories: 350 kcal
- Sugar: 24 g
- Sodium: 180 mg
- Fat: 26 g
- Saturated Fat: 15 g
- Unsaturated Fat: 9 g
- Trans Fat: 0.5 g
- Carbohydrates: 22 g
- Fiber: 2 g
- Protein: 5 g
- Cholesterol: 85 mg
Keywords: no-bake cheesecake, strawberry cheesecake, crunchy crust, easy dessert, fresh strawberries, creamy dessert