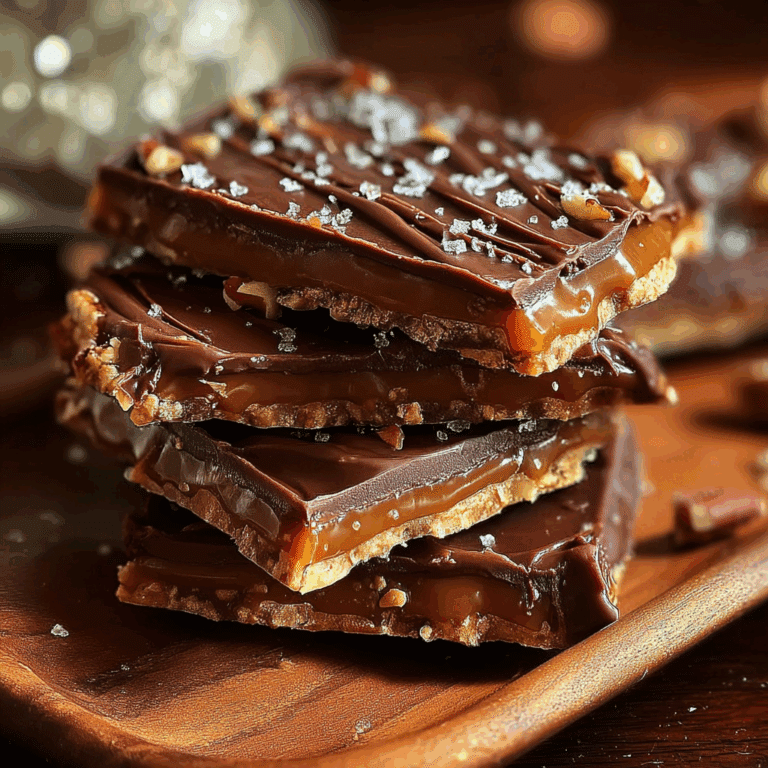
How to Make Butterfinger Delight at Home

If you love the rich, crunchy, and irresistibly sweet flavors reminiscent of your favorite candy bar, then learning to make Butterfinger Delight at home is a total game changer. This recipe combines that iconic buttery crunch with a smooth, melt-in-your-mouth sweetness that transforms simple ingredients into a showstopping treat. Whether you’re whipping it up for a special occasion, a cozy night in, or just satisfying your sweet tooth, Butterfinger Delight brings sweet, crunchy bliss right to your kitchen with ease and fun.
Why You’ll Love This Recipe
- Easy to Make: Simple steps and common ingredients mean you’ll be enjoying Butterfinger Delight in no time.
- Crunchy and Sweet: The perfect balance of crunchy peanut buttery texture and sweet notes keeps every bite exciting.
- Customizable: You can tweak the recipe to cater to your taste preferences or dietary needs without losing its essence.
- Great for Sharing: Perfect for parties, gifts, or gatherings because everyone loves a homemade sweet treat.
- No Special Equipment Required: All you need is basic kitchen gear to create this delicious dessert masterpiece.
Ingredients You’ll Need
Butterfinger Delight uses easy-to-find ingredients that each play an important role in building the texture, taste, and that signature buttery crunch everyone loves. From silky peanut butter to crunchy wafers, every element adds to the magic.
- Peanut Butter: Creamy or crunchy, it provides the rich, nutty foundation of the recipe.
- Butter: Adds that essential buttery richness that gives the dessert its name and smooth mouthfeel.
- Powdered Sugar: Ensures a sweet and smooth texture that blends perfectly with the peanut butter.
- Honey or Corn Syrup: Adds natural sweetness and helps bind the ingredients together.
- Crushed Crispy Wafers or Pretzels: For that unmistakable crunch that mimics the original Butterfinger bar.
- Vanilla Extract: Enhances the overall flavor with a warm, aromatic touch.
- Chocolate Chips or Melting Chocolate: Optional but highly recommended for coating or drizzling to complete the delight.
Variations for Butterfinger Delight
This recipe is wonderfully versatile, so feel free to customize Butterfinger Delight to match your taste buds or dietary preferences. It’s super easy to adapt by switching out or adding ingredients.
- Vegan Version: Use plant-based butter and dairy-free chocolate to keep it all vegan-friendly without skimping on taste.
- Nut-Free Option: Substitute peanut butter with sunflower seed butter or cookie butter for those with nut allergies.
- Extra Crunch: Mix in chopped nuts like almonds or pecans for added texture and nutty flavor.
- Chocolate Lovers’ Variation: Incorporate layers of melted chocolate between layers of peanut butter mixture for a richer experience.
- Low Sugar Alternative: Substitute honey or corn syrup with natural sweeteners like maple syrup or erythritol to cut back on sugars.

How to Make Butterfinger Delight
Step 1: Prepare the Base Mixture
Start by softening your butter in a mixing bowl until smooth. Add the peanut butter and mix until fully combined. Gradually sift in the powdered sugar to create a thick, spreadable dough. Stir in honey or corn syrup and vanilla extract until the mixture is sticky and holds together well.
Step 2: Add the Crunch
Gently fold in crushed crispy wafers or pretzels to the peanut butter mixture. This step is crucial because it adds that signature crunch, creating a texture reminiscent of the classic Butterfinger bar.
Step 3: Shape and Chill
Press the mixture firmly into a lined pan, spreading it out evenly. Pop it in the fridge for at least an hour to let it set; this helps the bars hold their shape and develop a dense, chewy texture.
Step 4: Coat or Drizzle with Chocolate
Once firm, melt your choice of chocolate chips or bar and either dip the chilled bars into the chocolate or drizzle it over the top. Return to the fridge until the chocolate hardens, sealing your Butterfinger Delight with a luscious chocolate layer.
Step 5: Cut and Serve
Use a sharp knife to cut the set mixture into bars or bite-sized pieces. Enjoy immediately or store for later indulgence.
Pro Tips for Making Butterfinger Delight
- Use Room Temperature Ingredients: Ensures smooth mixing and prevents graininess in your final product.
- Crush Wafers or Pretzels to the Right Size: Too fine, and you lose crunch; too large, and the bars won’t hold well.
- Don’t Overmix: Over stirring can make the texture tough instead of delightfully chewy.
- Chilling Time Matters: Give the mixture enough time to set for clean cuts and perfect texture.
- Choose Quality Peanut Butter: A natural, unsweetened peanut butter enhances flavor without overpowering sweetness.
How to Serve Butterfinger Delight
Garnishes
Dust your Butterfinger Delight with a light sprinkle of flaky sea salt or finely chopped peanuts to enhance both flavor and presentation. A drizzle of extra melted chocolate or caramel sauce works beautifully too.
Side Dishes
This treat pairs wonderfully with a scoop of vanilla ice cream, a dollop of whipped cream, or even a cup of strong coffee or milk to balance the sweetness perfectly.
Creative Ways to Present
For parties, present Butterfinger Delight in decorative paper liners, stack layers separated by parchment paper, or cut into fun shapes using cookie cutters for extra festive vibes.
Make Ahead and Storage
Storing Leftovers
Store your Butterfinger Delight bars in an airtight container in the refrigerator for up to one week to keep freshness and crunch intact.
Freezing
Wrap bars tightly in plastic wrap and place in a freezer-safe container. Frozen Butterfinger Delight can last up to two months and thaw quickly at room temperature.
Reheating
Since this dessert is best enjoyed chilled or at room temperature, avoid microwaving. Simply let frozen bars thaw for 20–30 minutes before serving for the best texture.
FAQs
Can I use crunchy peanut butter?
Yes, crunchy peanut butter adds even more texture to Butterfinger Delight, enhancing the crunchy experience many people crave.
Is there a gluten-free option?
Absolutely! Substitute crushed wafers or pretzels with gluten-free alternatives or crushed gluten-free cereal to keep it safe for gluten-sensitive diets.
How long does Butterfinger Delight last?
When kept in an airtight container in the refrigerator, it typically stays fresh and delicious for about one week.
Can I make Butterfinger Delight without chocolate?
Yes! The base is delicious on its own, but chocolate adds a lovely richness. Feel free to skip it if preferred.
What’s the best way to crush the wafers or pretzels?
Place them in a ziplock bag and gently crush them with a rolling pin or use a food processor for a quicker, more even texture.
Final Thoughts
If you’re ready to add a homemade twist to your dessert arsenal, Butterfinger Delight is an absolute must-try. It’s easy, fun, and offers that nostalgic crunch wrapped in creamy, sweet goodness. Whip it up for any occasion or an everyday treat—you’ll find yourself coming back for more with every bite!
Related Posts
- How to Make Homemade Vanilla Ice Cream Easily
- Why Byron Bay Chocolate Chip Cookies Are Irresistible
- Why Best Peach Dump Cake Steals Hearts
Butterfinger Delight
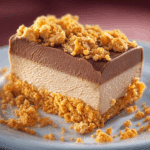
Butterfinger Delight is a rich, crunchy, and irresistibly sweet homemade treat inspired by the classic Butterfinger candy bar. Combining smooth peanut butter, buttery richness, and crispy wafers or pretzels, this dessert is easy to make, customizable, and perfect for sharing. Finished with a luscious chocolate coating, it offers a nostalgic crunch and creamy sweetness that’s perfect for any occasion.
- Prep Time: 15 minutes
- Cook Time: 0 minutes
- Total Time: 1 hour 15 minutes
- Yield: 12 bars 1x
- Category: Dessert
- Method: No-bake
- Cuisine: American
- Diet: Gluten Free (if gluten-free wafers or pretzels are used)
Ingredients
Main Ingredients
- 1 cup peanut butter (creamy or crunchy)
- 1/2 cup butter, softened
- 2 cups powdered sugar, sifted
- 1/4 cup honey or corn syrup
- 1 tsp vanilla extract
- 1 cup crushed crispy wafers or pretzels
- 1 cup chocolate chips or melting chocolate (optional, for coating or drizzling)
Instructions
- Prepare the Base Mixture: Soften the butter in a mixing bowl until smooth. Add peanut butter and mix thoroughly until fully combined. Gradually sift in the powdered sugar, stirring to create a thick, spreadable dough. Stir in honey or corn syrup and vanilla extract until the mixture is sticky and cohesive.
- Add the Crunch: Gently fold the crushed crispy wafers or pretzels into the peanut butter mixture, ensuring even distribution to create the signature crunchy texture reminiscent of a Butterfinger bar.
- Shape and Chill: Press the mixture firmly and evenly into a lined pan. Refrigerate for at least one hour to set, allowing the bars to develop a dense and chewy texture that holds shape when cut.
- Coat or Drizzle with Chocolate: Melt the chocolate chips or melting chocolate. Dip the chilled bars into the melted chocolate or drizzle it over the top. Return to the fridge until the chocolate hardens, sealing the dessert with a smooth chocolate layer.
- Cut and Serve: Using a sharp knife, cut the set mixture into bars or bite-sized pieces. Serve immediately or store for later enjoyment.
Notes
- Use room temperature ingredients to ensure smooth mixing and prevent graininess.
- Crush wafers or pretzels to a medium size to maintain crunch without compromising structure.
- Avoid overmixing to keep the texture chewy rather than tough.
- Allow sufficient chilling time for easy cutting and perfect set texture.
- Choose natural, unsweetened peanut butter for enhanced flavor balance.
Nutrition
- Serving Size: 1 bar
- Calories: 220
- Sugar: 18g
- Sodium: 110mg
- Fat: 14g
- Saturated Fat: 6g
- Unsaturated Fat: 7g
- Trans Fat: 0g
- Carbohydrates: 20g
- Fiber: 1g
- Protein: 5g
- Cholesterol: 25mg
Keywords: Butterfinger, peanut butter dessert, no bake, crunchy dessert, sweet treat, homemade candy bar, easy dessert, buttery crunch