How to Make Crispy Mongolian Beef Fast
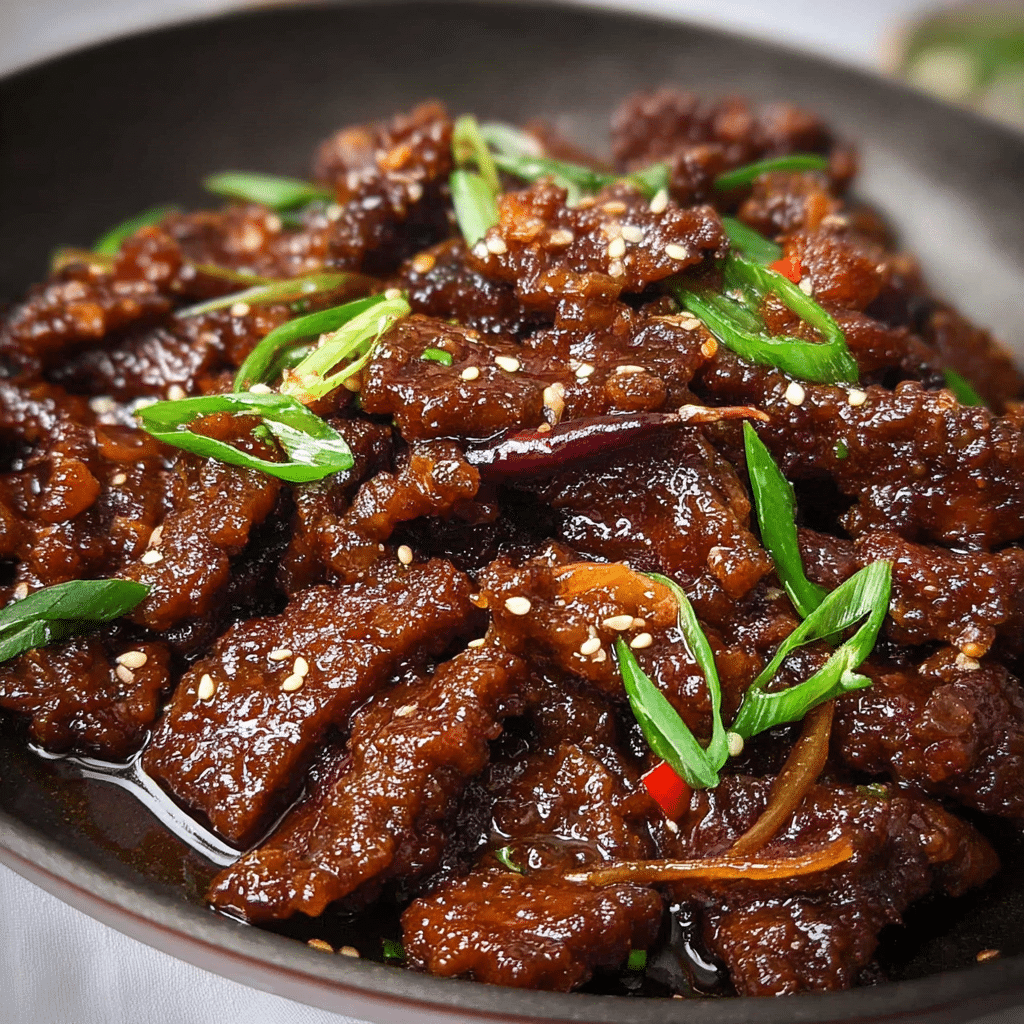
If you’re craving a dish that’s bursting with flavor, tender meat, and irresistibly crispy edges, look no further than Crispy Mongolian Beef. This quick and easy recipe brings together savory soy sauce, a touch of sweetness, and the satisfying crunch of perfectly fried beef. Whether you’re feeding a hungry family or impressing guests on a busy weeknight, this dish delivers bold flavors and textures that come together in minutes for an unforgettable meal experience.
Why You’ll Love This Recipe
- Fast and Simple: Get a delicious meal on the table in under 30 minutes without complicated steps or hard-to-find ingredients.
- Crispy Texture: The beef’s golden, crunchy coating adds the perfect contrast to the tender inside for an addictive bite every time.
- Flavor Explosion: A harmonious blend of soy, garlic, ginger, and brown sugar creates a sauce that’s savory and slightly sweet.
- Customizable: Easy to tweak with different vegetables or protein options to suit your taste or dietary preferences.
- Perfect for Meal Prep: Keeps well in the refrigerator and makes great leftovers that reheat beautifully.
Ingredients You’ll Need
Gather a handful of simple but essential ingredients that come together to build the authentic flavor and texture of Crispy Mongolian Beef. Each item plays a vital role, from the beef’s tenderness to the sauce’s glossy finish.
- Flank Steak: Thinly sliced beef that crisps up perfectly while staying tender inside.
- Cornstarch: Creates that signature crispy crust on the beef when fried.
- Soy Sauce: The salty, umami foundation of the Mongolian sauce.
- Brown Sugar: Adds a subtle sweetness balancing the savory flavors.
- Garlic and Ginger: Fresh aromatics that infuse the dish with warmth and depth.
- Green Onions: Provide fresh, bright notes as a garnish and subtle crunch.
- Vegetable Oil: Perfect for frying the beef to an even, crunchy crispness.
- Water or Beef Broth: Creates the sauce base, enhancing flavor and consistency.
Variations for Crispy Mongolian Beef
Feel free to make this Crispy Mongolian Beef recipe your own! It’s incredibly adaptable, so you can switch up ingredients or add extras based on what you have on hand or dietary needs.
- Vegetable Boost: Add bell peppers, broccoli, or snap peas to increase nutrition and crunch.
- Spice it Up: Incorporate red pepper flakes or sriracha for a spicy kick.
- Protein Swap: Try chicken breast or tofu for different textures and flavors.
- Gluten-Free Version: Use tamari or coconut aminos instead of soy sauce, and a gluten-free cornstarch alternative.
- Low-Sugar Option: Replace brown sugar with a sugar substitute like monk fruit or erythritol.

How to Make Crispy Mongolian Beef
Step 1: Prep the Beef
Start by thinly slicing the flank steak against the grain for tenderness. Toss the beef slices with cornstarch in a bowl until each piece is coated evenly. This step is crucial for achieving that irresistible crispy crust.
Step 2: Make the Sauce
Whisk together soy sauce, brown sugar, minced garlic, grated ginger, and a splash of water or beef broth in a small bowl. This mixture will become your glossy, flavorful Mongolian sauce that coats the beef perfectly.
Step 3: Fry the Beef
Heat vegetable oil in a large skillet or wok over medium-high heat. Fry the coated beef strips in batches, making sure not to crowd the pan. Cook each batch until golden and crispy, then transfer to a paper towel-lined plate to drain excess oil.
Step 4: Combine and Simmer
Remove excess oil from the pan, then pour in the sauce mixture. Allow it to simmer for 1-2 minutes until it thickens slightly. Return the crispy beef to the pan and toss quickly to coat every bite with the luscious sauce.
Step 5: Garnish and Serve
Sprinkle sliced green onions over the top just before serving. This adds freshness and a pop of color that perfectly complements the rich flavors and crispy texture.
Pro Tips for Making Crispy Mongolian Beef
- Pat Dry the Beef: Moisture prevents crispiness, so be sure to dry your sliced steak thoroughly before coating.
- Don’t Overcrowd the Pan: Fry in small batches to keep the oil hot and beef crispy.
- Use Fresh Aromatics: Fresh garlic and ginger make a marked difference in flavor compared to powders or pre-minced versions.
- Adjust Sauce Consistency: To thicken the sauce further, add a small cornstarch slurry towards the end, cooking until glossy and clingy.
- Serve Immediately: Crispy Mongolian Beef tastes best right after cooking; waiting too long can soften the crust.
How to Serve Crispy Mongolian Beef
Garnishes
Fresh green onions and toasted sesame seeds make wonderful garnishes, adding contrasting textures and a burst of flavor that brightens the dish.
Side Dishes
Serve with steamed jasmine rice or fluffy brown rice to soak up the delicious sauce. For extra veggies, pair with a simple stir-fried bok choy or a cucumber salad for cooling crunch.
Creative Ways to Present
Try serving Crispy Mongolian Beef in lettuce wraps for a lighter, handheld option. Alternatively, toss it over cooked noodles or in a bowl with mixed greens for a fusion-style meal.
Make Ahead and Storage
Storing Leftovers
Place leftover Crispy Mongolian Beef in an airtight container and refrigerate for up to 3 days. Store sauce and beef together to keep flavors intact.
Freezing
This dish can be frozen, but for best texture, freeze the beef and sauce separately. Thaw overnight in the refrigerator before reheating.
Reheating
Reheat in a hot skillet over medium heat to revive the crispiness, stirring gently to avoid breaking the beef pieces. Avoid microwaving to maintain texture.
FAQs
Can I use a different cut of beef for Crispy Mongolian Beef?
Yes, while flank steak is ideal for tenderness and texture, you can use sirloin or skirt steak sliced thinly, but avoid tougher cuts that might require longer cooking times.
Is Crispy Mongolian Beef spicy?
The traditional recipe isn’t spicy, but you can easily add chili flakes, fresh chili, or hot sauce to kick up the heat if desired.
Can I make this recipe gluten-free?
Absolutely! Substitute regular soy sauce with tamari or coconut aminos and cornstarch with a gluten-free starch like arrowroot powder.
How long does it take to make Crispy Mongolian Beef?
This recipe is designed to be quick, with prep and cooking combined taking about 20 to 30 minutes.
What can I serve with Crispy Mongolian Beef for a balanced meal?
Pair it with steamed rice and a variety of vegetables like broccoli, snap peas, or carrots for a balanced plate full of nutrients and flavor.
Final Thoughts
This Crispy Mongolian Beef recipe is a fantastic way to enjoy restaurant-quality flavors and textures in your own kitchen quickly and easily. Its crispy, tender beef paired with a savory-sweet sauce is sure to become a favorite go-to dinner. So grab your ingredients and get cooking — you’re just minutes away from a delicious meal that everyone will love!
Related Posts
- Easy Cabbage Rolls Recipe for Comfort Food
- Why Million Dollar Spaghetti Tastes Amazing
- Easy Company Casserole Recipes to Try Tonight
Crispy Mongolian Beef
Crispy Mongolian Beef is a quick and easy dish featuring tender, thinly sliced flank steak coated in cornstarch and fried to a golden crisp. It’s coated in a savory-sweet sauce made from soy sauce, brown sugar, garlic, and ginger, delivering bold flavors and irresistible textures in under 30 minutes. Perfect for weeknights, it’s customizable, great for meal prep, and pairs excellently with rice and vegetables.
- Prep Time: 10 minutes
- Cook Time: 15 minutes
- Total Time: 25 minutes
- Yield: 4 servings 1x
- Category: Main Course
- Method: Frying
- Cuisine: Asian
- Diet: Gluten Free
Ingredients
Main Ingredients
- 8 oz flank steak, thinly sliced against the grain
- 1/2 cup cornstarch
- 2 tablespoons vegetable oil, for frying
Sauce Ingredients
- 1/3 cup soy sauce
- 2 tablespoons brown sugar
- 2 cloves garlic, minced
- 1 tablespoon fresh ginger, grated
- 1/4 cup water or beef broth
Garnish
- 2 green onions, sliced
- Optional: toasted sesame seeds
Instructions
- Prep the Beef: Thinly slice the flank steak against the grain to ensure tenderness. Pat the slices dry thoroughly to remove moisture. Toss the beef slices in cornstarch in a bowl until each piece is evenly coated. This step is essential for achieving the crispy crust.
- Make the Sauce: In a small bowl, whisk together soy sauce, brown sugar, minced garlic, grated ginger, and a splash of water or beef broth. This mixture will become the glossy, flavorful Mongolian sauce.
- Fry the Beef: Heat vegetable oil in a large skillet or wok over medium-high heat. Fry the coated beef strips in batches, avoiding overcrowding the pan to keep the oil hot and the beef crispy. Cook each batch until golden and crispy, then transfer to a paper towel-lined plate to drain excess oil.
- Combine and Simmer: Remove excess oil from the pan, then pour in the prepared sauce mixture. Let it simmer for 1-2 minutes until it thickens slightly. Return the crispy beef to the pan and toss quickly to coat each piece with the luscious sauce.
- Garnish and Serve: Sprinkle sliced green onions and toasted sesame seeds over the top just before serving. This adds freshness, a pop of color, and complementary textures to the dish.
Notes
- Pat dry the beef thoroughly to ensure crispiness.
- Fry the beef in small batches to avoid overcrowding the pan.
- Use fresh garlic and ginger for best flavor.
- To thicken the sauce further, add a cornstarch slurry (cornstarch mixed with water) near the end of cooking.
- Serve immediately to maintain the crispy texture; the crust softens if left too long.
Nutrition
- Serving Size: 1 serving
- Calories: 350 kcal
- Sugar: 8 g
- Sodium: 800 mg
- Fat: 15 g
- Saturated Fat: 3.5 g
- Unsaturated Fat: 9 g
- Trans Fat: 0 g
- Carbohydrates: 22 g
- Fiber: 1 g
- Protein: 28 g
- Cholesterol: 75 mg
Keywords: Crispy Mongolian Beef, Mongolian beef recipe, crispy beef, Asian beef stir-fry, quick dinner, gluten-free meal