Why Pineapple Bliss Bars Are Your New Favorite Treat
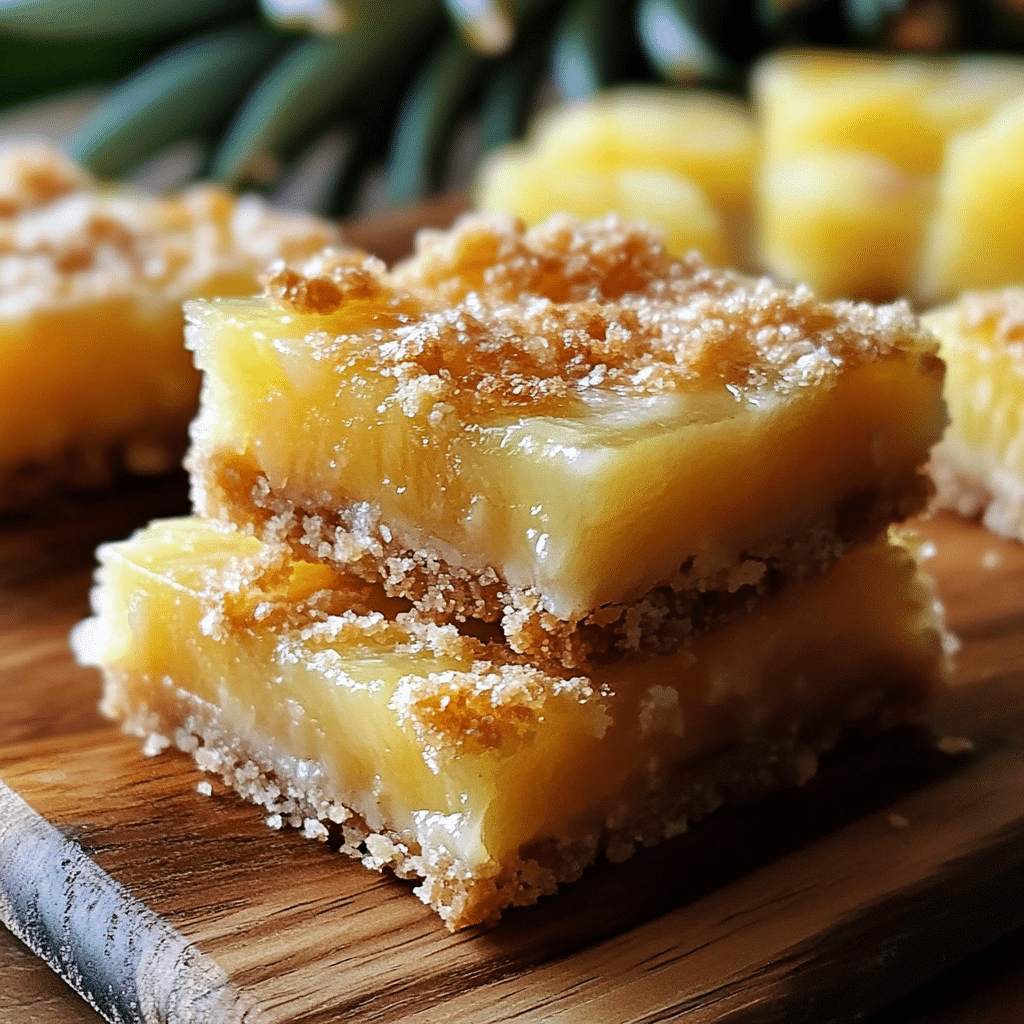
Discover the tropical delight of Pineapple Bliss Bars, a sweet and tangy treat perfect for any time you need a quick, delicious bite. These bars balance the juicy freshness of pineapple with a tender, crumbly base, creating an irresistible combination that feels like a mini vacation in every bite. Soft, flavorful, and bursting with natural fruitiness, Pineapple Bliss Bars are set to become your new favorite go-to snack or dessert.
Why You’ll Love This Recipe
- Effortlessly delicious: Pineapple Bliss Bars require minimal preparation but deliver maximum flavor, making them perfect for beginners and busy cooks.
- Tropical flavor punch: The fresh pineapple offers a natural sweetness and tang that brightens up the entire bar.
- Perfect texture combo: A crisp crust meets a moist, fruity filling, creating a delightful mouthfeel with every bite.
- Versatile snacking: These bars work equally well as a breakfast treat, afternoon snack, or light dessert.
- Portable and shareable: Individually portioned and easy to pack, they’re a crowd-pleaser at picnics, potlucks, or on-the-go indulgences.
Ingredients You’ll Need
Each ingredient in Pineapple Bliss Bars plays an essential role, from building structure and moisture to adding burst of flavor and color. The combination feels simple but results in a standout tropical snack that everyone will adore.
- Fresh pineapple: Provides juicy, sweet-tart fruitiness that’s the star of the recipe.
- All-purpose flour: Forms the backbone of the crust and crumbly topping, creating structure and a tender bite.
- Butter: Adds richness and helps achieve that golden, buttery crust texture.
- Sugar: Balances pineapple’s tartness and ensures a lightly sweet finish.
- Eggs: Bind the layers and provide moisture for perfect softness inside.
- Baking powder: Gives a gentle rise to lighten the bars without overwhelming fluffiness.
- Vanilla extract: Enhances the flavors with a warm, aromatic touch.
- Lemon juice (optional): Intensifies pineapple’s natural zing and keeps the fruit fresh tasting.
Variations for Pineapple Bliss Bars
Feel free to get creative with Pineapple Bliss Bars—this recipe adapts wonderfully depending on what you have on hand or your dietary preferences. From nutty twists to flavor boosts, the possibilities are endless.
- Coconut addition: Sprinkle shredded coconut on top for an extra layer of tropical goodness and texture.
- Gluten-free version: Substitute all-purpose flour with a gluten-free baking mix for a celiac-friendly option.
- Spiced pineapple: Add cinnamon or ginger to the filling for a warm, spicy kick.
- Nut topping: Chop walnuts or pecans to sprinkle over the crust for crunch and flavor contrast.
- Greek yogurt swirl: Mix some yogurt into the pineapple layer to add tang and extra moisture.

How to Make Pineapple Bliss Bars
Step 1: Prepare the Pineapple Filling
Begin by finely chopping fresh pineapple or using crushed pineapple with minimal liquid. Mix it gently with lemon juice and a touch of sugar to enhance sweetness and brightness while allowing some juice to thicken naturally during baking.
Step 2: Make the Crust and Topping
In a large bowl, combine flour, sugar, baking powder, and salt. Cut chilled butter into the dry ingredients using a pastry cutter or your fingers until the mixture resembles coarse crumbs. Reserve a portion of this mixture for the crumb topping.
Step 3: Assemble the Bars
Press the larger portion of your crumb mixture into a greased baking dish to create an even, firm crust. Spread the pineapple filling evenly over the crust, then sprinkle the reserved crumbles on top to create a textured finish.
Step 4: Bake to Perfection
Bake the bars in a preheated oven at 350°F (175°C) for approximately 35-40 minutes or until the top is golden and the pineapple filling is bubbly and set.
Step 5: Cool and Slice
Allow the bars to cool completely in the pan to let the filling set properly, which makes slicing clean and easy. Cut into squares or rectangles and serve.
Pro Tips for Making Pineapple Bliss Bars
- Use ripe pineapple: The sweeter and juicier the pineapple, the more flavorful the bars will be.
- Chill the butter: Cold butter helps create a crumbly crust that bakes into tender, flaky bits.
- Don’t overmix dough: Mixing until just combined keeps the texture light and crumbly.
- Press crust firmly: This ensures a sturdy base that holds the juicy pineapple filling without sogginess.
- Cool thoroughly: Letting the bars cool completely helps the layers set, making slicing easier and cleaner.
How to Serve Pineapple Bliss Bars
Garnishes
A light dusting of powdered sugar or fresh mint leaves on top add a touch of elegance and a pop of color, enhancing the presentation and taste without overpowering the bars’ flavor.
Side Dishes
Pineapple Bliss Bars pair beautifully with a scoop of vanilla ice cream or a dollop of whipped cream for a decadent dessert experience. For a lighter snack, serve them alongside fresh fruit or a green tea.
Creative Ways to Present
Consider arranging the bars on a platter with edible flowers or drizzle with a tropical fruit glaze for parties. Wrapping individual bars in parchment paper tied with twine makes charming gifts or convenient snacks to take on the go.
Make Ahead and Storage
Storing Leftovers
Store Pineapple Bliss Bars in an airtight container at room temperature for up to two days, or refrigerate for up to a week to keep them fresh and moist.
Freezing
Wrap individual bars tightly in plastic wrap and aluminum foil, then freeze for up to three months. Thaw overnight in the fridge or at room temperature before serving.
Reheating
Warm bars briefly in a microwave for 15-20 seconds or in a low oven to refresh their just-baked texture and release the pineapple’s aromatic sweetness.
FAQs
Can I use canned pineapple instead of fresh?
Yes, you can use canned pineapple, but drain it well to avoid excess moisture that could make the bars soggy. Fresh pineapple tends to give the best texture and flavor.
Are Pineapple Bliss Bars gluten-free?
The classic recipe uses all-purpose flour, which contains gluten, but you can swap in gluten-free flour blends to make this treat safe for gluten-sensitive diets.
How long do Pineapple Bliss Bars last?
Stored properly, they stay fresh for about 5-7 days in the refrigerator or up to 3 months in the freezer.
Can I make these bars vegan?
Absolutely! Use plant-based butter and substitute eggs with flax or chia egg alternatives to create vegan-friendly bars that still taste amazing.
What’s the best way to cut the bars evenly?
Use a sharp knife and wait until the bars are completely cooled. For perfect edges, wipe the knife blade clean between cuts.
Final Thoughts
Pineapple Bliss Bars bring a fresh, tropical burst of flavor combined with a buttery, tender crust that’s sure to brighten your day. Whether you’re looking to impress guests, treat yourself, or find a new favorite recipe for on-the-go snacking, these bars offer irresistible sweetness and sunshine in every bite. Give them a try—you just might find your new favorite treat!
PrintPineapple Bliss Bars

Pineapple Bliss Bars are a tropical-inspired, sweet and tangy dessert featuring a juicy pineapple filling layered over a tender, crumbly buttery crust. Perfectly balanced with a crisp base and moist fruit layer, these bars are easy to make, portable, and versatile enough for snacks, breakfast, or dessert.
- Prep Time: 15 minutes
- Cook Time: 40 minutes
- Total Time: 55 minutes
- Yield: 12 bars 1x
- Category: Dessert
- Method: Baking
- Cuisine: Tropical
- Diet: Gluten Free (if using gluten-free flour substitute)
Ingredients
For the Pineapple Filling
- 1 ½ cups fresh pineapple, finely chopped or crushed (drain excess juice if canned)
- 1 tablespoon lemon juice (optional)
- 2 tablespoons sugar
For the Crust and Topping
- 2 cups all-purpose flour (or gluten-free baking mix for gluten-free version)
- ¾ cup sugar
- 1 teaspoon baking powder
- ¼ teaspoon salt
- 12 tablespoons (1 ½ sticks) cold unsalted butter, cut into small pieces
- 2 large eggs
- 1 teaspoon vanilla extract
Instructions
- Prepare the Pineapple Filling: Finely chop fresh pineapple or use well-drained crushed pineapple. Mix gently with lemon juice and sugar to enhance sweetness and brightness, allowing the natural juices to thicken during baking.
- Make the Crust and Topping: In a large bowl, combine flour, sugar, baking powder, and salt. Cut in the chilled butter using a pastry cutter or fingers until the mixture resembles coarse crumbs. Reserve about one-third of the mixture for the crumb topping.
- Assemble the Bars: Press the remaining crumb mixture firmly and evenly into a greased baking dish to form the crust. Spread the pineapple filling evenly on top, then sprinkle the reserved crumb mixture over the pineapple to create a textured topping.
- Bake to Perfection: Preheat the oven to 350°F (175°C). Bake the assembled bars for 35-40 minutes or until the top is golden brown and the pineapple filling is bubbly and set.
- Cool and Slice: Remove from oven and allow bars to cool completely in the pan so the filling sets for clean slicing. Cut into squares or rectangles and serve.
Notes
- Use ripe, juicy pineapple for the best flavor.
- Keep the butter cold to achieve a crumbly and flaky crust.
- Mix dough ingredients just until combined to maintain a light texture.
- Press the crust firmly into the pan to prevent sogginess from the filling.
- Cool bars thoroughly before cutting for neat slices.
Nutrition
- Serving Size: 1 bar (1/12 of recipe)
- Calories: 220
- Sugar: 15g
- Sodium: 110mg
- Fat: 10g
- Saturated Fat: 6g
- Unsaturated Fat: 3g
- Trans Fat: 0g
- Carbohydrates: 30g
- Fiber: 1g
- Protein: 2g
- Cholesterol: 40mg
Keywords: pineapple, tropical dessert, fruit bars, crumb bars, quick dessert, gluten-free option, easy baking