Easy 7 Layer Punch Bowl Dessert Recipe Ideas
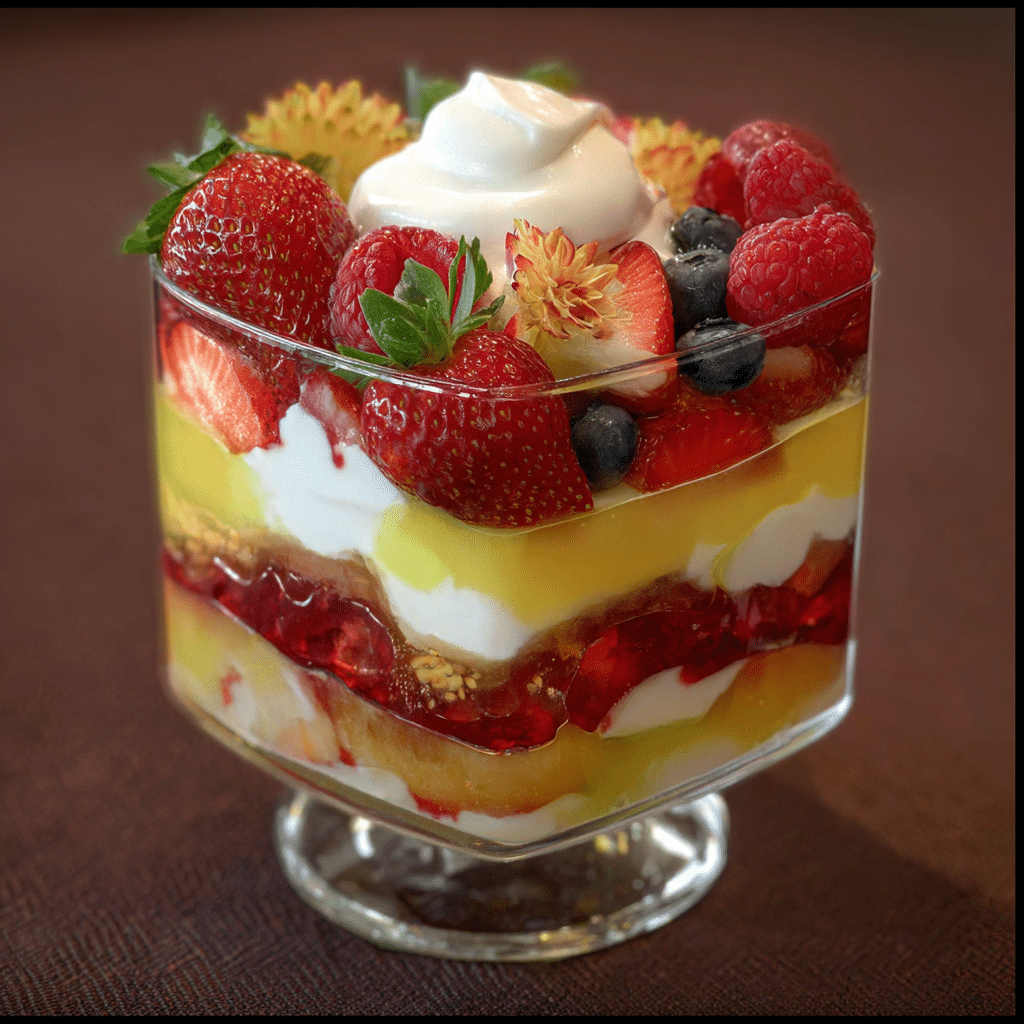
If you’re looking for a show-stopping dessert that’s both simple to make and sure to wow your guests, the 7 Layer Punch Bowl Dessert is your new best friend. This delightful treat layers sweet, creamy, and colorful ingredients in a big punch bowl, making it perfect for parties and gatherings where sharing is caring. Each spoonful offers a heavenly blend of textures and flavors, combining rich chocolate, tangy fruit, fluffy whipped cream, and crunchy nuts in one irresistible dish. Whether it’s a holiday celebration or casual get-together, this dessert brings freshness, fun, and that special homemade touch everyone will love.
Why You’ll Love This Recipe
- Effortless Layering: Requires no-bake prep and minimal time, so it’s beginner-friendly and fast.
- Perfect for Crowds: Made in a large punch bowl, it’s ideal for feeding a party without fuss.
- Flavor Explosion: Combines creamy, fruity, crunchy, and sweet elements for complex taste.
- Visually Stunning: Gorgeous layered presentation that’s sure to wow guests even before the first bite.
- Customizable: You can tweak layers to match your favorite flavors or dietary needs.
Ingredients You’ll Need
The beauty of the 7 Layer Punch Bowl Dessert is how it relies on simple, easily accessible ingredients that each play a crucial role in the overall flavor and texture. Every layer contributes something unique — from creaminess to crunch, sweetness to zest — making every mouthful a delightful surprise.
- Instant Chocolate Pudding Mix: A quick way to add rich, smooth chocolate flavor with minimal effort.
- Cold Milk: Needed to set the pudding properly and achieve that creamy texture.
- Crushed Cookies or Graham Crackers: Adds a crunchy base layer that balances softness with a bit of texture.
- Whipped Topping or Fresh Whipped Cream: Light and airy, this layer adds fluffy sweetness and creaminess.
- Sliced Strawberries or Mixed Berries: Fresh fruit adds natural sweetness, tang, and vibrant color.
- Bananas: Creamy and sweet, they blend beautifully with other fruit flavors.
- Chopped Nuts (like pecans or walnuts): Offers a crunchy contrast and extra flavor depth.
- Vanilla Pudding Mix (optional): Can be added for extra creamy layers if you want a combo of chocolate and vanilla.
Variations for 7 Layer Punch Bowl Dessert
This dessert is endlessly adaptable, making it a fantastic canvas for creativity. Whether you want to accommodate allergies, dietary restrictions, or simply try new flavors, swapping or adding a few ingredients can personalize your punch bowl masterpiece.
- Dairy-Free Version: Use coconut milk pudding and dairy-free whipped topping to keep it allergy-friendly.
- Tropical Twist: Replace berries with pineapple chunks and mango slices for a fresh flavor burst.
- Nut-Free Option: Leave out nuts or substitute with toasted coconut flakes for crunch without allergies.
- Chocolate Lovers’ Dream: Double the chocolate pudding layers or add chocolate chips between layers.
- Low-Sugar Swap: Use sugar-free pudding mixes and fresh fruit to reduce sweetness without sacrificing taste.

How to Make 7 Layer Punch Bowl Dessert
Step 1: Prepare the Base Layer
Start by crushing your cookies or graham crackers into fine crumbs and sprinkle them evenly at the bottom of a large punch bowl. This crunchy base adds structure and contrasts the creamy layers.
Step 2: Make the Chocolate Pudding
Mix your instant chocolate pudding with cold milk according to package instructions. Whisk well until thickened, then pour a layer over the cookie base. Chill briefly if needed to set slightly.
Step 3: Add Whipped Topping
Gently spread a generous layer of whipped topping or homemade whipped cream on top of the pudding, creating a light and creamy layer that balances richness.
Step 4: Layer the Fruit
Arrange sliced bananas and strawberries or your choice of berries evenly over the whipped topping. Fresh fruit adds juicy bursts of flavor and vibrant color.
Step 5: Sprinkle the Nuts
Scatter chopped pecans, walnuts, or your preferred nuts over the fruit for a crunchy pop that complements the softness of the other layers.
Step 6: Repeat the Layers
Depending on your bowl size, continue layering pudding, whipped topping, fruit, and nuts until you complete all seven delicious layers, finishing off with a topping of whipped cream and a decorative sprinkle of nuts or chocolate shavings.
Step 7: Chill and Serve
Cover the punch bowl with plastic wrap and refrigerate for at least 2 hours to let the flavors meld beautifully. Serve chilled with a large spoon for guests to enjoy every wonderful layer.
Pro Tips for Making 7 Layer Punch Bowl Dessert
- Layer Order Matters: Start with crunchy ingredients at the base and creamy layers in between to maintain texture contrast.
- Use Fresh Fruit: Ripe, juicy berries or bananas bring natural sweetness and prevent the dessert from tasting artificial.
- Chill Thoroughly: Refrigerate for at least 2 hours so all layers set and flavors blend perfectly.
- Whip Your Own Cream: If possible, whip fresh cream for an extra fluffy, fresh taste instead of canned toppings.
- Keep Nuts Fresh: Toast nuts lightly before chopping to enhance their flavor and crunch.
How to Serve 7 Layer Punch Bowl Dessert
Garnishes
Finish your dessert with a sprinkle of chocolate shavings, a handful of fresh berries, or a dusting of cocoa powder to add an eye-catching, tasty garnish that invites guests to dig in.
Side Dishes
Pair this layered treat with light, refreshing sides like fresh fruit salad or a tangy sorbet for balance, or serve alongside coffee to complete the sweet experience.
Creative Ways to Present
Serve in a large clear glass punch bowl or transparent trifle dish to showcase every colorful, luscious layer. For smaller portions, scoop into individual parfait glasses or cups with visible layers for a charming presentation.
Make Ahead and Storage
Storing Leftovers
Keep leftovers covered tightly in the refrigerator and consume within 2-3 days to enjoy the best flavor and texture, as the fruit and cream can soften over time.
Freezing
This dessert is not recommended for freezing since whipped cream and fresh fruit don’t maintain their texture well after thawing.
Reheating
Reheating is not needed or recommended; serve this dessert chilled to preserve its refreshing layers and flavors.
FAQs
Can I use fresh pudding instead of instant pudding mix?
Yes, but instant pudding mix is preferred for its convenience and firmer texture, which helps the layers hold together better in the punch bowl.
What can I substitute for nuts if I have allergies?
To avoid nuts, use toasted coconut flakes or crunchy granola for texture without compromising flavor.
How far in advance can I make the 7 Layer Punch Bowl Dessert?
It’s best made a few hours ahead or the night before, but avoid making it more than 24 hours prior to prevent fruit from browning or sogginess.
Can I make this dessert vegan?
Absolutely! Swap dairy pudding and whipped cream for coconut-based or other plant-based alternatives to keep this dessert vegan-friendly.
What’s the best way to serve this dessert at a party?
Use a large clear punch bowl placed on a decorated table, and provide large spoons or ladles for easy serving to your guests.
Final Thoughts
The 7 Layer Punch Bowl Dessert combines ease, beauty, and irresistible flavor into one perfect dish for any celebration. Whether you stick to the classic layers or try your own variations, this dessert is sure to become a crowd favorite. So grab your favorite ingredients and start layering some happiness in a bowl—you won’t regret it!
Related Posts
- Why Apple Fritter Cake Is Your New Favorite Treat
- Why Creamy Filled Pumpkin Roll Is a Must-Try Treat
- 5 Reasons Strawberry Cream Pie To Die For Shines
7 Layer Punch Bowl Dessert

The 7 Layer Punch Bowl Dessert is an effortless no-bake treat perfect for parties and gatherings. It features seven delicious layers combining creamy chocolate pudding, crunchy cookie crumbs, airy whipped cream, fresh fruit, and nuts, creating a visually stunning and flavor-packed dessert that everyone will love.
- Prep Time: 15 minutes
- Cook Time: 0 minutes
- Total Time: 2 hours 15 minutes (including chilling)
- Yield: 12 to 16 servings 1x
- Category: Desserts
- Method: No-Bake
- Cuisine: American
- Diet: Vegetarian
Ingredients
Base Layer
- 1 to 2 cups crushed cookies or graham crackers
Pudding Layers
- 1 package instant chocolate pudding mix (3.9 oz)
- 2 cups cold milk
- (Optional) 1 package instant vanilla pudding mix (3.4 oz)
Whipped Cream Layers
- 2 to 3 cups whipped topping or fresh whipped cream
Fruits
- 1 to 2 cups sliced strawberries or mixed berries
- 2 medium bananas, sliced
Nuts
- 1/2 cup chopped nuts (pecans or walnuts)
Instructions
- Prepare the Base Layer: Crush cookies or graham crackers into fine crumbs and evenly sprinkle them at the bottom of a large punch bowl to create a crunchy base layer.
- Make the Chocolate Pudding: Whisk instant chocolate pudding mix with cold milk according to package instructions until thickened, then pour a layer over the cookie base. Chill briefly if needed to set slightly.
- Add Whipped Topping: Gently spread a generous layer of whipped topping or freshly whipped cream over the pudding to add lightness and creaminess.
- Layer the Fruit: Evenly arrange sliced bananas and strawberries or mixed berries on top of the whipped cream layer for natural sweetness and vibrant color.
- Sprinkle the Nuts: Scatter chopped pecans, walnuts, or preferred nuts over the fruit to add a crunchy texture that complements the soft layers.
- Repeat the Layers: Continue layering pudding, whipped topping, fruit, and nuts until all seven layers are complete, finishing with a final layer of whipped cream topped with nuts or chocolate shavings for decoration.
- Chill and Serve: Cover the punch bowl with plastic wrap and refrigerate for at least 2 hours to allow flavors to meld perfectly. Serve chilled with a large spoon for easy sharing.
Notes
- Layer order matters: start with crunchy ingredients at the base and alternate creamy and fruity layers to maintain texture contrast.
- Use fresh, ripe fruit to enhance natural sweetness and flavor.
- Chill thoroughly for at least 2 hours to let all layers set properly.
- Whip your own cream if possible for a fresher, fluffier texture compared to canned toppings.
- Toast nuts lightly before chopping to bring out their flavor and crunch.
- This dessert is best enjoyed within 2-3 days when stored covered in the refrigerator.
- Not recommended for freezing due to whipped cream and fresh fruit texture loss after thawing.
- Can be made vegan or dairy-free by substituting pudding mixes and whipped toppings with plant-based alternatives.
Nutrition
- Serving Size: 1 cup
- Calories: 290
- Sugar: 28g
- Sodium: 150mg
- Fat: 14g
- Saturated Fat: 7g
- Unsaturated Fat: 5g
- Trans Fat: 0g
- Carbohydrates: 36g
- Fiber: 2g
- Protein: 4g
- Cholesterol: 20mg
Keywords: 7 layer dessert, punch bowl dessert, no-bake dessert, party dessert, layered pudding dessert, chocolate pudding dessert